PhotoPatch Pro is an image editing application for Apple iOS iPad devices. It was developed by me specifically to retouch and blend images in the most creative way. In these blog’s pages I’m publishing a series of tips and tutorials to show you how to get the most creative results from it.
Let’s begin this series of “making-of” with a winter composition, just to take a fresh breath during this hot summer!
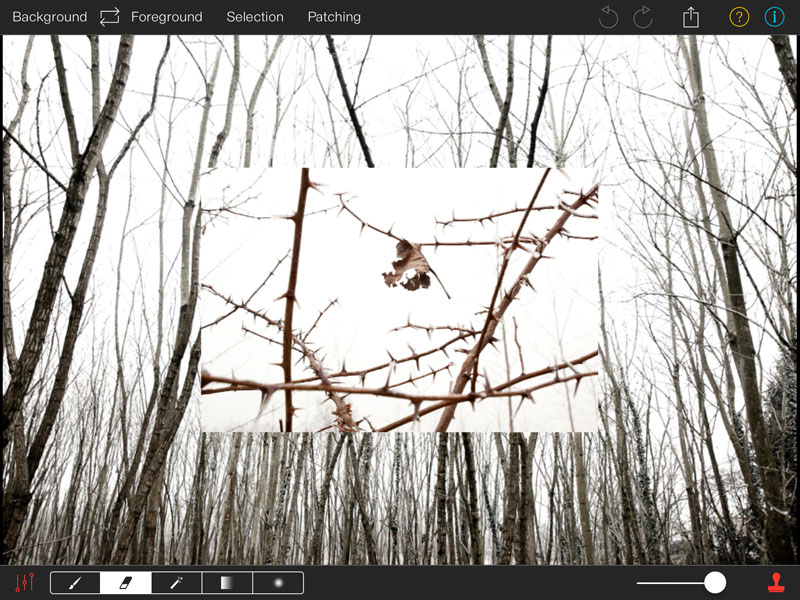
First thing: launch PhotoPatch and load a background and a foreground image. You’ll find the load button by opening each of the respective menus on the upper application bar.
I took the two images for this tutorial from one of my first photo-projects called LifeCycle. Specifically, the opening image (the leafless woods) will be my background image and the dead leaf entangled among thorns is going to be the foreground image.
As you can see after loading it PhotoPatch places the foreground at the center of the screen and with a smaller size than the background one. This is done to prevent that the latter gets completely covered by the former. However, you can move, rotate and resize the foreground image any time by using two fingers over it.
My goal here is to merge the two images by creating a somehow surreal final result. As usual, playing creatively with blending and effect filters can lead to several completely different results. I’ll show you some of those possibilities.
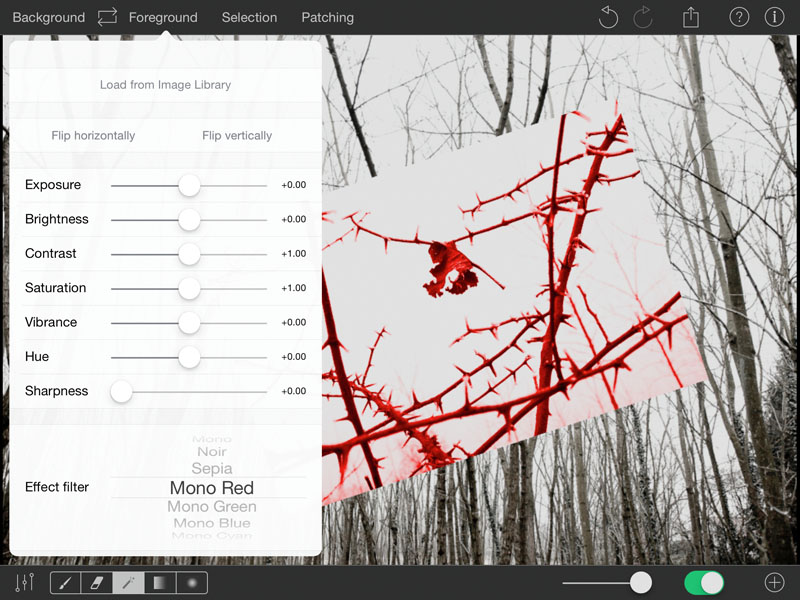
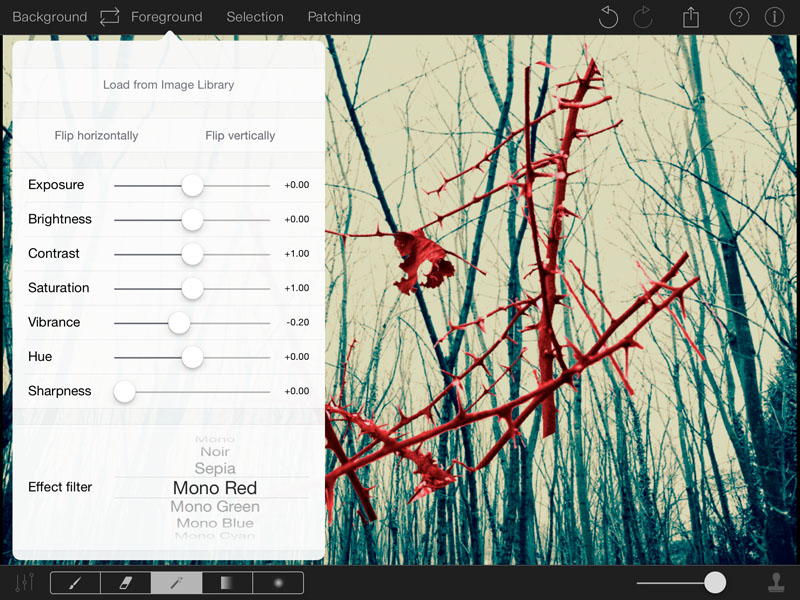
Now I add a “mono red” filter effect to the foreground image, just to make it more dramatic. All the tuning filters related to the foreground image are located inside the menu “Foreground” located on the upper application bar.
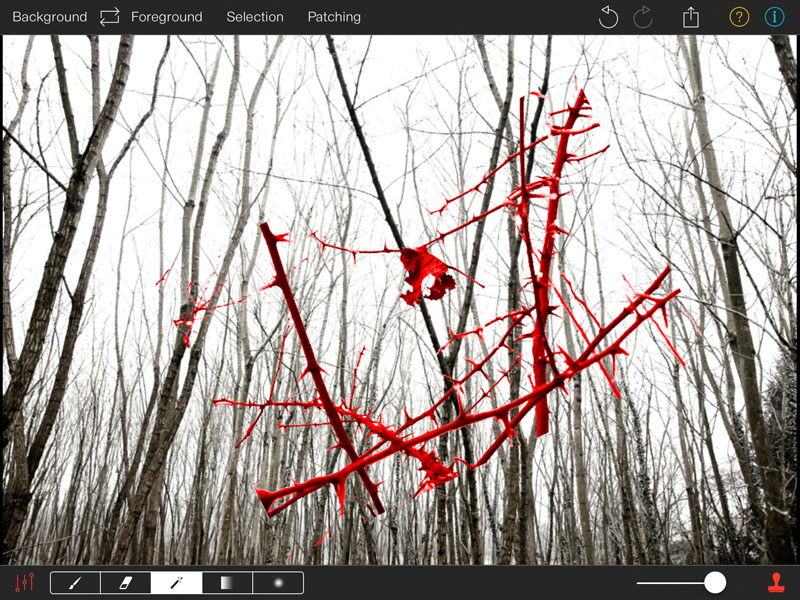
Now I’ll use the magic wand tool to unselect (mask out) the sky of the foreground image, leaving only the branches and the leaf visible. You’ll find the magic wand tool on the left area of the bottom application bar. This tool is able to unselect (or select) a contiguous area of similar colors, starting from the finger’s touch point. The tool’s parameters are accessible by pressing the bottom left “levels” button, just on on the left of the tool bar. For the magic wand tool there are two parameters: the tolerance and the behavior. With the former you can specify how tolerant the magic wand will be towards color differences. The latter option specifies whether the tool will select or unselect the affected area. Since I want to mask out the sky, I’ll let the “unselect” behavior active. The default tolerance should work well for the majority of cases.
As for every tool in PhotoPatch, to use it just place the finger in the desired point and keep it still for a few moments, then the tool will perform its action. As you’ll see, by using the magic wand it’s relatively fast and easy to mask out uniform backgrounds such as the sky. Let’s complete the work:
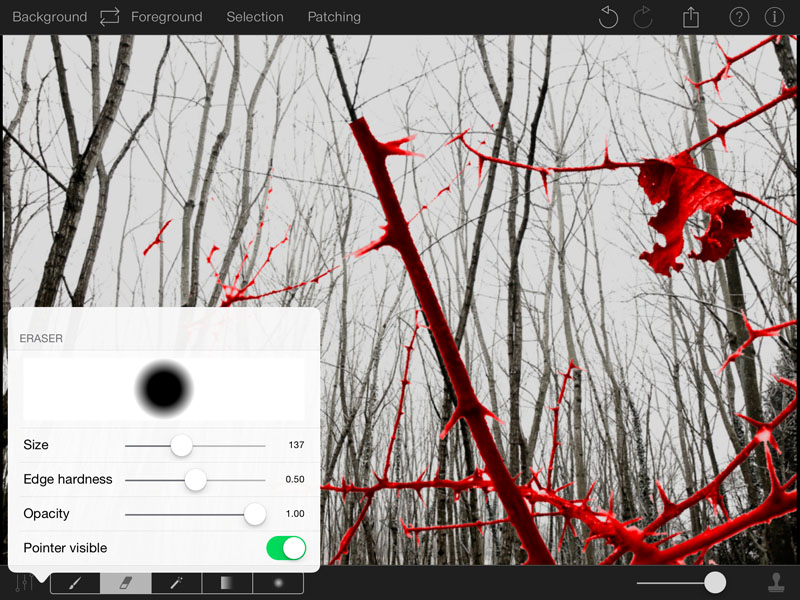
If needed, we can refine things with the eraser tool. With this tool you can unselect a portion of the foreground image by just drawing onto it with your finger. After selecting it on the tools’ palette, as usual keep your finger holding for a few moments to activate the eraser, then move your finger to draw. PhotoPatch offers some settings for the eraser. You can vary it’s size, its opacity and edge hardness. Before working with the eraser, I’ll zoom the foreground image a bit in order to work better on the details. You can move, scale and rotate the foreground image by just pinching and dragging it with two fingers:
I’m going to remove some small pieces of branches that are no more bound together:
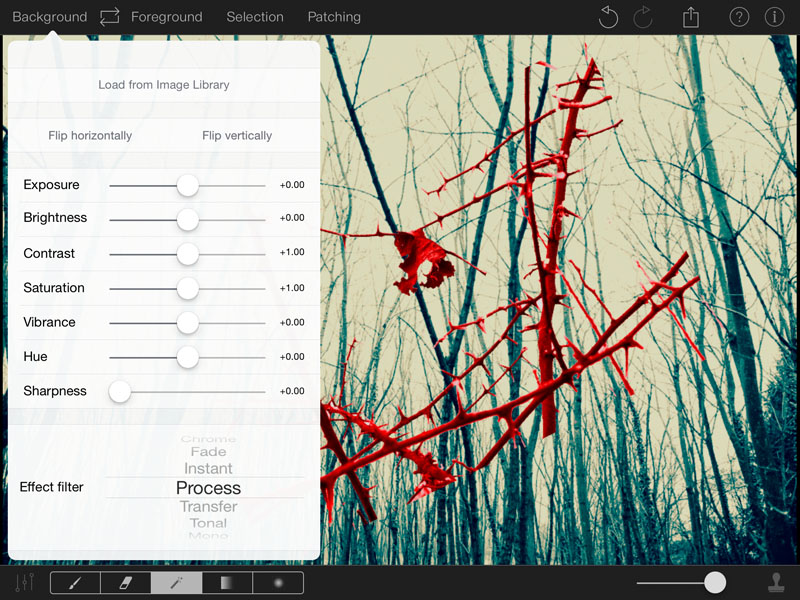
Great! Now I have a bunch of bloody brunches that can be easily overlapped to the background image! But in order to make the image even more surreal, I’ll add a Process filter to the background image. Like for the foreground image, all the tuning effects related to the background image are accessible through its menu “Background” located on the upper application bar:
I do really believe that this color combination looks pretty good! But to my taste the red saturation seems a little too strong. I’ll desaturate its vibrance a little bit:
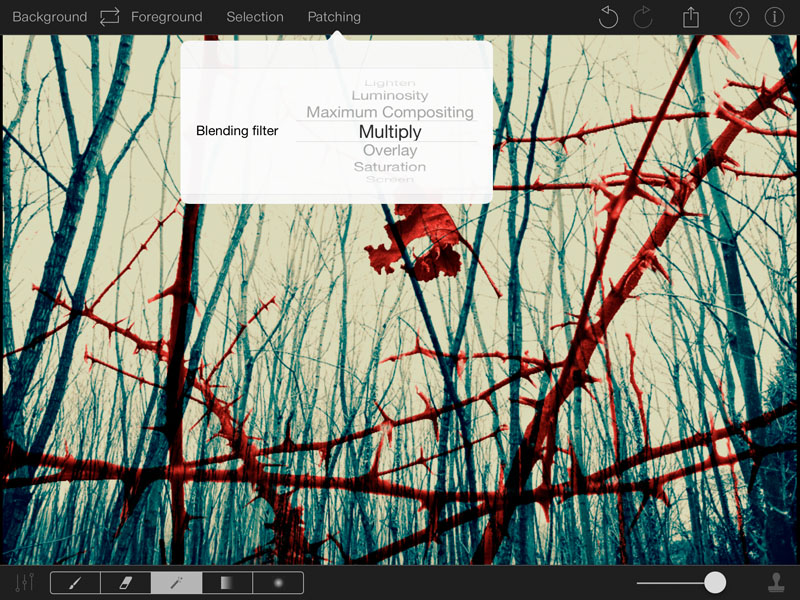
Perfect! At this point I can position the foreground image to my taste. This can be done by moving, rotating and scaling it with two finger. Fast and easy! You can enlarge it and choose to overlay only a portion. Remember, however, not to overdo with the enlargement, you’ll loose resolution by using only a tiny portion of the image. For this example I’ll choose to overlay the entire image. With a double tap on the screen the foreground image will be arranged to fulfill the background one (but keeping its proportions). After aligning it I’ll change the blending filter to “Multiply”, which merges the two images in a way that I often like. Playing with blending filters is a fundamental step if you wish to obtain creative results!
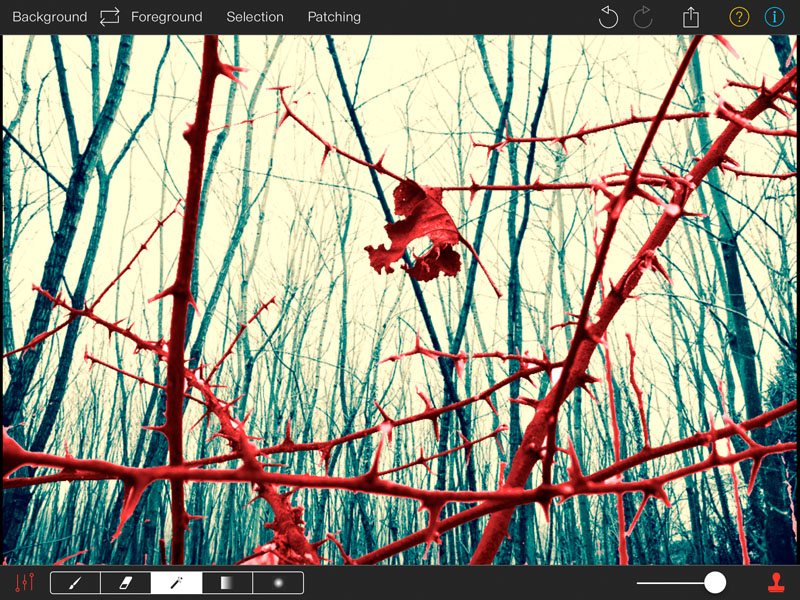
And that’s it, here is the final image:
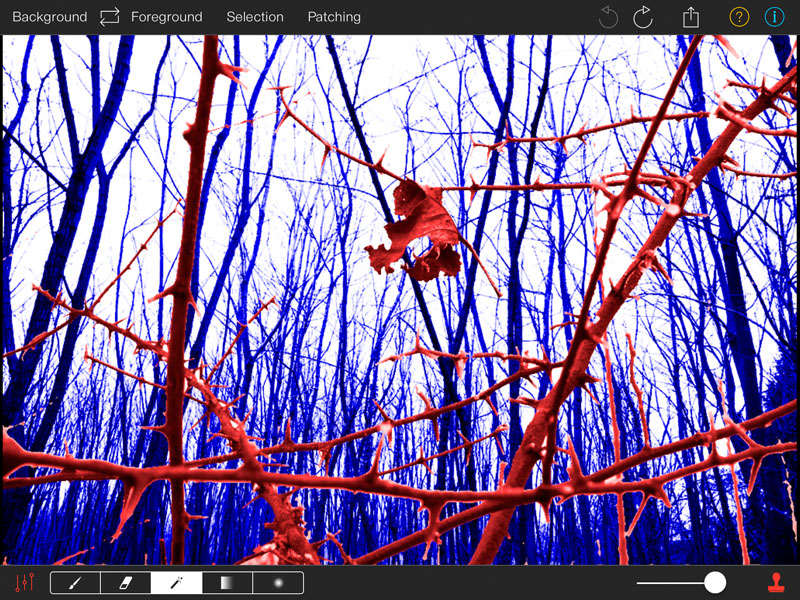
I can now finalize the work by applying the foreground image to the background one. This is achieved by just pressing the patch button (stamp) located in the rightmost point of the bottom application bar. After doing that, remember to hide the foreground image by lovering its opacity to zero (with the slider) in order to see only the patched background.

Patch the foreground image onto the background one and lowers the foreground transparency to see only the background.
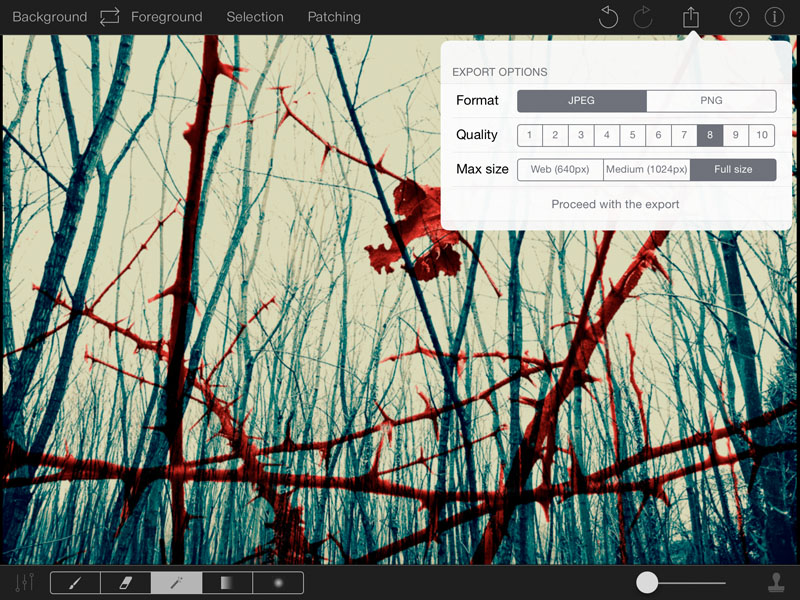
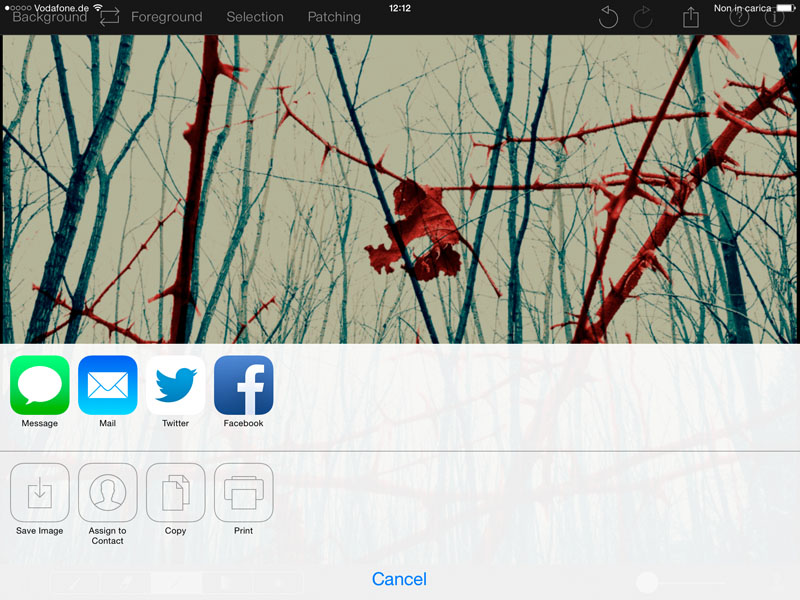
When I’m satisfied with the result, I can save it by means of the export button located in the the upper application bar, near the undo/redo buttons. We have two choices for the image format (Jpeg and Png) and three image sizes. The image can be saved to the Image Library or exported to other messaging applications such as social networks, E-mail and Message apps. Note that the “Lite” version of PhotoPatch will only exports at the lower resolution. If you want a hi-res final image you must buy the PhotoPatch Pro version.
Variants:
Here is a variant obtained by choosing a “Mono Blue” filter for the background image and a “Source Over” blending filter:
Another variant obtained by swapping the background and foreground image (by means of the double arrow button between the image’s menus) and selecting the “Saturation” blending filter. With this combination the woods (which now are on the foreground) will “texture” the thorny branches and the leaf:
An here is another variant made by using a subtractive blending filter:
I hope that this example has helped you to discover some of the features and creative potentialities of PhotoPatch.
More tutorial and examples will come!
If you like PhotoPatch, please visit the PhotoPatch Official Facebook’s page and contribute by posting your image patches!





Dear PhotoPatch’s lovers,
a new version (2.0) is on the way out, currently under Apple’s approval. It provides the following new features and bug fixes:
– New image effect filter: “Posterise”
– Now the magic-wand has new options to work with non-contiguous areas and to toggle antialiasing around the edges of the selection on or off.
– Image flipping now is way faster.
– Image patching now is faster.
– Fixed a bug that sometimes caused an application crash when patching more than one time on iOS 9.
– Fixed a bug which failed to apply the selection mask before exporting the patched image.
– General bug fixing and performance improvements.
If you like the app, please take the time to leave a feedback on iTunes App Store!
This will give me a motivation to work and enhance it more and more.
Thank you all!
Stay tuned!
I am a fan of Apple IOS along. I already use this PhotoPatch Pro software. Beyond doubt, it’s a great image editing software.
Hi Sinthia,
thank you very much. I’m already working on the next version with a lot of new features.
If you really like PhotoPatch Pro, please be so kind and take the time to add a feedback for it on the Apple Store!
This is a very nice app for photo editing. But when this app will be available in android also..
Thank you for your kind feedback Gyanender. If the iOS version will get enough success I’ll plan for sure an Android edition.